Alicante province
Microcement in Alicante — Seamless Floors, Walls & Bathrooms, No Demolition
Microcement in Alicante renews floors, walls, bathrooms, stairs and kitchen worktops with a seamless, waterproof, joint-free finish, applied over your existing surfaces with barely any demolition. It is an on-trend solution we deliver with our own team and a 2-year guarantee across the Costa Blanca.
Free quote
Same-day response. No obligation.
- Area
- Alicante & province
- Quote
- On request, no obligation
- Guarantee
- 2 years
- Timescale
- Full bathroom in microcement: 3–5 days including curing.
Microcement is a coating just a few millimetres thick, applied over existing tiles, floors, partitions or worktops. Because nothing is chipped out, there is no rubble and far fewer days on site — a real advantage in occupied homes and in rental apartments that cannot be closed for weeks.
Its great strength is continuity: with no joints or individual pieces, a space looks larger and cleaner and the grout lines where dirt collects disappear. With the right sealing it becomes waterproof, making it ideal for shower trays, bathroom walls, kitchens and worktops.
We offer a wide range of colours and finishes — from polished cement to a more artisan mottled look — to achieve the contemporary style that local owners and overseas buyers want. For remote clients we agree colour, texture and sheen by photo and video before we begin.
Microcement in Alicante: what's included
Microcement floors
A seamless, joint-free floor over tiles or screed, hard-wearing and easy to clean.
Walls and bathrooms
Waterproof coating over existing tiling on bathroom walls, showers and wet areas.
Walk-in shower bases
Seamless built-in showers with no prefab tray, custom fall and sealing.
Stairs and treads
Interior staircases coated for a uniform finish across tread and riser.
Kitchen worktops
Worktops and kitchen fronts in microcement, seamless with no visible joints.
Sealing and protection
Primer, resin coats and sealer for a waterproof, long-lasting finish.
The full scope of Microcement works
Every job we take on within this service, with the detail of how we carry it out. The price is always fixed after the survey.
Preparing the substrate
Consolidating the existing tiles
- What we do
- Preparing the tiling or stoneware we will coat over, without ripping it out.
- How we do it
- We tap every tile to find the hollow ones and re-bed only those, then degrease and abrade the glaze. Leave one hollow tile and the crack eventually draws itself through the microcement.
Bonding coat and primer
- What we do
- The key coat that bonds the microcement to the existing surface.
- How we do it
- Epoxy primer broadcast with sand on non-absorbent surfaces, acrylic on porous ones. This is the coat that decides whether the finish lasts or lets go within a couple of years.
Anti-fracture mesh
- What we do
- Embedded reinforcement so the joints in the substrate cannot telegraph through.
- How we do it
- We bed fibreglass mesh into the base coat across the whole area, and especially over tile joints, material changes and corners — the places where movement in the substrate cracks the finish.
Levelling the surface
- What we do
- Correcting dips and deep joints before the finish coats go on.
- How we do it
- We fill with repair mortar and sand back. Microcement is only 2–3mm thick and corrects nothing: whatever is out of true underneath will look just as out of true on top.
Protecting the property
- What we do
- Masking up joinery, sanitaryware and adjoining rooms.
- How we do it
- We seal the doorway with a zipped dust screen and protect frames, taps and floors. Sanding between coats throws very fine dust, and this protection is what lets you carry on living in the house.
Application room by room
Seamless living-room floor
- What we do
- A joint-free floor over tiles or screed in living areas and hallways.
- How we do it
- Two base coats and two finish coats by trowel, sanded between each. We respect the building movement joints with a flexible joint: covering them with a continuous coat is precisely what causes cracking.
Bathroom and shower walls
- What we do
- Waterproof coating over the existing tiling, with nothing ripped out.
- How we do it
- We run wall into floor with a cove at the junction so there is no sharp edge for water to get behind. Over old tiling we mesh the entire area so the grout lines cannot show through.
Walk-in shower base
- What we do
- A seamless shower with no prefab tray, falling to the drain.
- How we do it
- We form a 2% fall in mortar and tank it with liquid membrane and banding at the junctions before any microcement goes on. Microcement seals, but the real waterproofing sits underneath it.
Kitchen worktop and splashback
- What we do
- Worktop, splashback and island in a seamless finish with no visible joints.
- How we do it
- We reinforce the front edge and the sink cut-out — where it gets knocked and where water sits — and seal with a food-safe, grease-resistant product.
Stairs and treads
- What we do
- A continuous finish across tread and riser.
- How we do it
- We form a rounded nosing on the tread edge and add anti-slip aggregate to the sealer on the walking surface, because a polished microcement step is genuinely slippery.
Sealing and putting into use
Two-part polyurethane sealer
- What we do
- The final coats that waterproof and protect the microcement.
- How we do it
- Two coats of water-based two-part polyurethane with a light sand between them. This is the coat that makes the whole thing waterproof — microcement on its own is porous and stains.
Level of sheen
- What we do
- Choosing between a matt, satin or gloss finish.
- How we do it
- Matt hides the hard-water marking of this area far better; satin shows limescale rings if the surface is not dried. We show you a sample of all three before we seal.
Anti-slip sealer
- What we do
- Aggregate-loaded protection for showers, bathrooms and stairs.
- How we do it
- We add fine aggregate to the last coat in wet areas. It keeps the seamless look but gives grip, and solves the classic problem of a continuous floor inside a shower.
Curing and first use
- What we do
- How long before you can walk on it and use the water.
- How we do it
- You can walk on it at 24–48 hours, but the polyurethane is not fully cured for about 7 days: until then no new silicone, no rugs, no heavy shower use. We put the dates in writing for you.
Colour, finish and aftercare
Colour range and on-site sample
- What we do
- Choosing colour and texture from a real sample before we apply.
- How we do it
- We make the sample in your own property under your own light, because the same grey reads completely differently under Mediterranean light. For overseas owners we send photos and video of the samples.
Texture and effect
- What we do
- From an even polished cement to a more artisan clouded, mottled look.
- How we do it
- Texture is decided on the last coat by how the trowel is worked: the mottled look disguises wear, the flat one demands more skill. We tell you which ages better in each room.
Repairs and touch-ups
- What we do
- Making good marks, knocks or worn patches.
- How we do it
- We sand the area, rebuild the finish and re-seal the whole panel to a natural break, so you are not left with a patch of different sheen. We keep your colour formula on file for future touch-ups.
Aftercare and cleaning
- What we do
- How to look after the sealer long term.
- How we do it
- Neutral soap only — no ammonia and no bleach, both of which attack polyurethane. In busy areas a fresh coat of sealer every few years is worth it: one day, no disruption.
Rental property turnaround
- What we do
- Microcement in holiday lets between seasons.
- How we do it
- We work in phases to hand the property back as early as possible and plan the curing inside the low-occupancy window, so the next booking walks into a finished bathroom.
Microcement in Alicante step by step: how we work
- 1
Site visit
We assess the surfaces and choose colour, texture and finish.
- 2
Fixed-price quote
We set out m², rooms and timescale in a written fixed price.
- 3
Application
We prepare the base and apply the microcement and sealer coats.
- 4
Handover with guarantee
Curing, final protection and a 2-year guarantee on the application.
Timescales for Microcement in Alicante
- Full bathroom in microcement: 3–5 days including curing.
- Living-room floor over existing tiles: 4–6 days.
- Home with several rooms: 1.5–2.5 weeks in phases.
Pricing your Microcement in Alicante: how we quote
Every project is unique: the price fits your job.
We do not use one-size-fits-all price lists. After a free, no-obligation site visit we prepare a detailed personalised quote, with a fixed price agreed before we start.
Microcement in Alicante: before & after
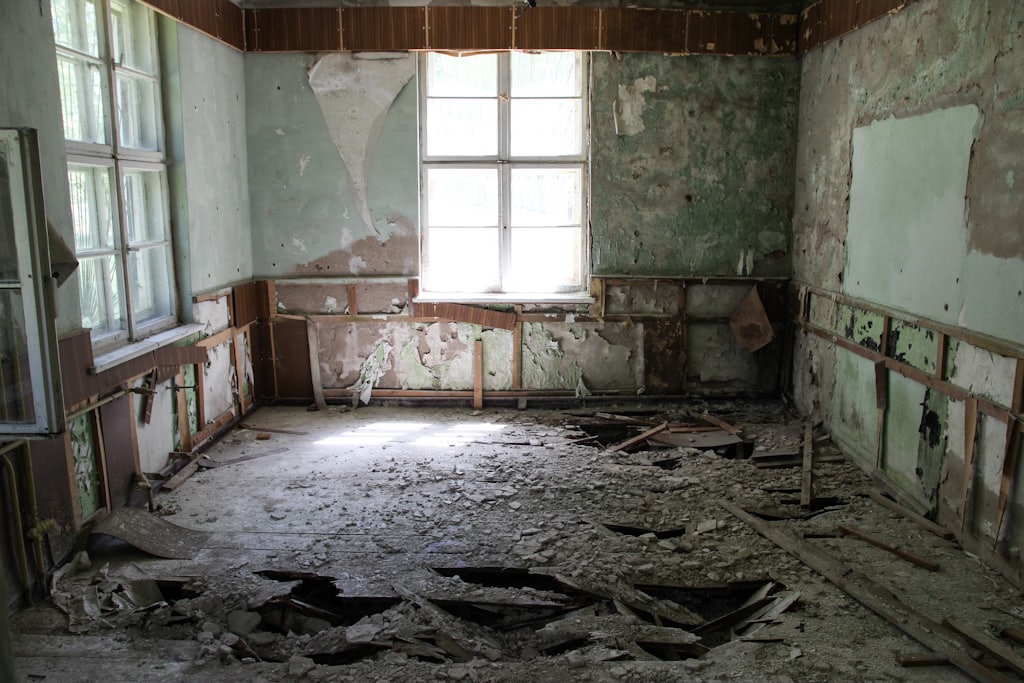
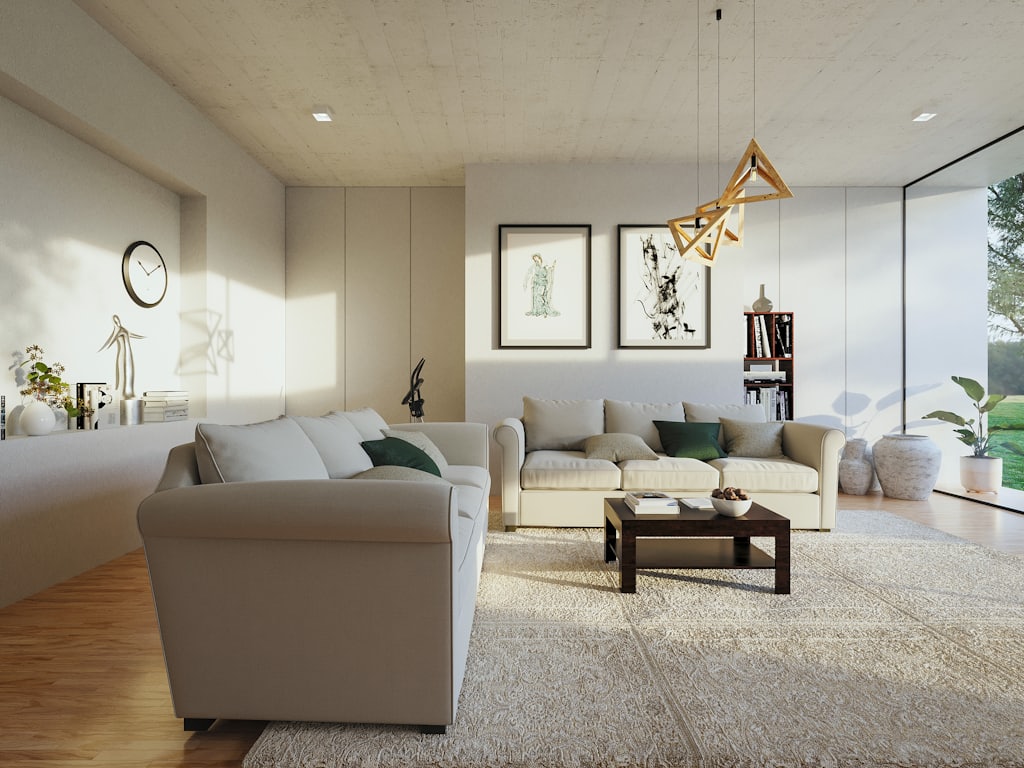
Tile-free bathroom in microcement
Alicante centre
Shower and walls coated over the existing tiling, no demolition, in 4 days.
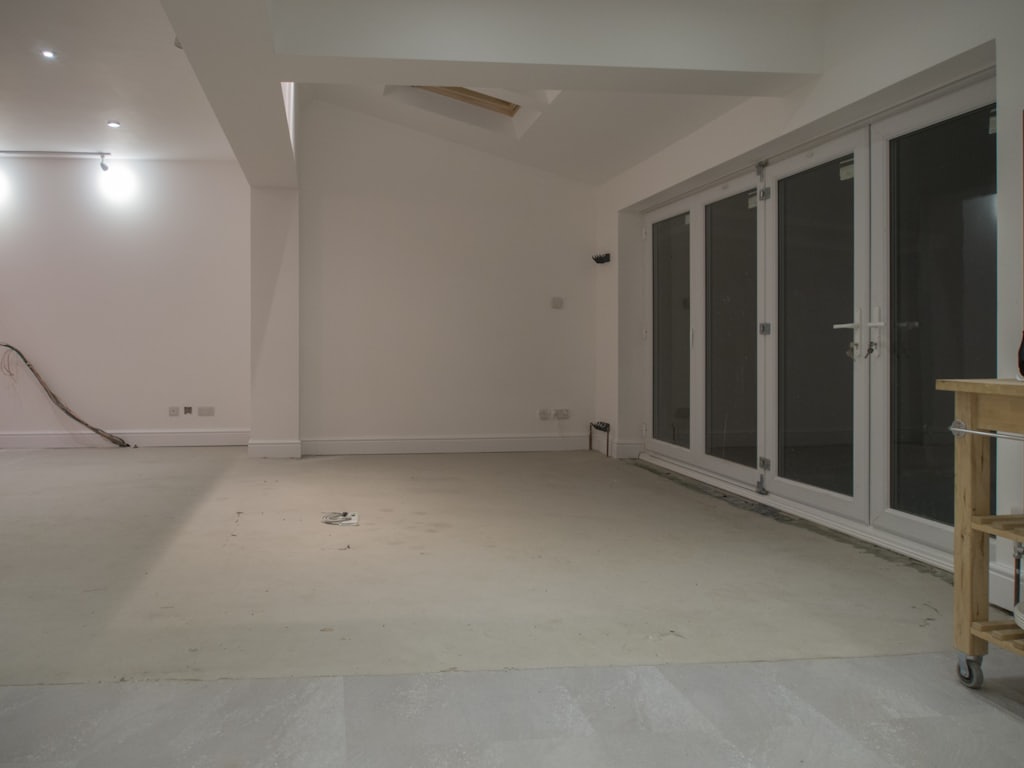

Seamless living-room floor
Villajoyosa
Polished grey microcement over old tiles in a 30 m² living room, no joints.
Microcement: customer reviews in Alicante
“Professional approach to renovation and construction services. The communication is clear, the team pays attention to details, and the overall presentation gives a good impression of reliability and quality.”
“A very good professional service with a strong focus on the customer. Communication was clear and all questions were handled quickly. Overall, I had a very positive experience and would be happy to recommend Renixo.”
“Дякую за прекрасну роботу та виконання мого замовлення.”
Microcement: frequently asked questions in Alicante
How much does microcement cost in Alicante?
The price depends on the square metres, whether it goes on floors, walls or bathrooms, the condition of the starting surface and the finish chosen. As it is applied by hand in layers, each project is priced individually. We fix the price after the visit: request a free, no-obligation quote.
Can microcement be applied without removing the tiles?
Yes. That is its main advantage: microcement is applied directly over existing tiles, floors, walls and worktops without chipping anything out. We prepare and consolidate the base and build up the coats on top, avoiding rubble and cutting the days of disruption in the home.
Is microcement waterproof for showers and bathrooms?
Yes. With the right primer and sealer, microcement forms a continuous, waterproof surface, ideal for shower trays, bathroom walls and kitchens. The absence of joints removes the points where water tends to seep in and where dirt usually builds up over time.
How long before it is dry and usable?
A microcement bathroom is usually ready in 3 to 5 days, including curing between coats and the final sealing. We recommend waiting a few days before heavy water use so the resin cures fully. We set out the exact timings in your quote before we start.
Does it crack or scratch with use?
Applied over a properly prepared base with the correct sealer, microcement resists foot traffic, water and daily use. Like any continuous surface it can mark under a hard impact, but it is repairable. The sealer protects against scratching and makes cleaning easy.
Microcement in Alicante town by town
Microcement: the areas we cover
Services related to Microcement
Ready for your free, no-obligation quote?
Free site visit and a personalised quote. Same-day response.